Konnexu Site Details
Follow the below guides to start a site, find DNS settings, find details on logging in to your business Email and SpamExperts dashboards, and viewing resource usage details. For DNS and Email Txt records, if you need further guidance than our basic guide, we recommend contacting your domain registrar as they'll have more knowledge of how their system is set up and can assist you.
For info on how to cancel a site (subscription), please view our subscription tutorial.
Starting a Site
In order to start a site, you will need a domain. Please purchase a domain if you haven't done it yet. There are many domain registrars, so we suggest checking prices and reviews before choosing one.
To start a site, please follow the "Starting a Subscription" guide in our subscription tutorial. Follow the guide below to Verify your domain after you start your subscription. You will then receive an Email with instructions for DNS and TXT records to set. These are in addition to the verification TXT record you need to set in order to verify the domain. Please note that after you set DNS records, it can take 24 - 48 hours for propagation based on your domain registrar. Sometimes, it takes minutes to an hour. It depends on the registrar. If your DNS does not propagate when you think it should, please contact your domain registrar for assistance.
Verifying a Domain and Finding DNS Records
You'll need to be logged in to the client dashboard, and your domain registrar. The below steps are only for the Konnexu client dashboard. You'll need to follow your registrar's guides in order to set these records there.
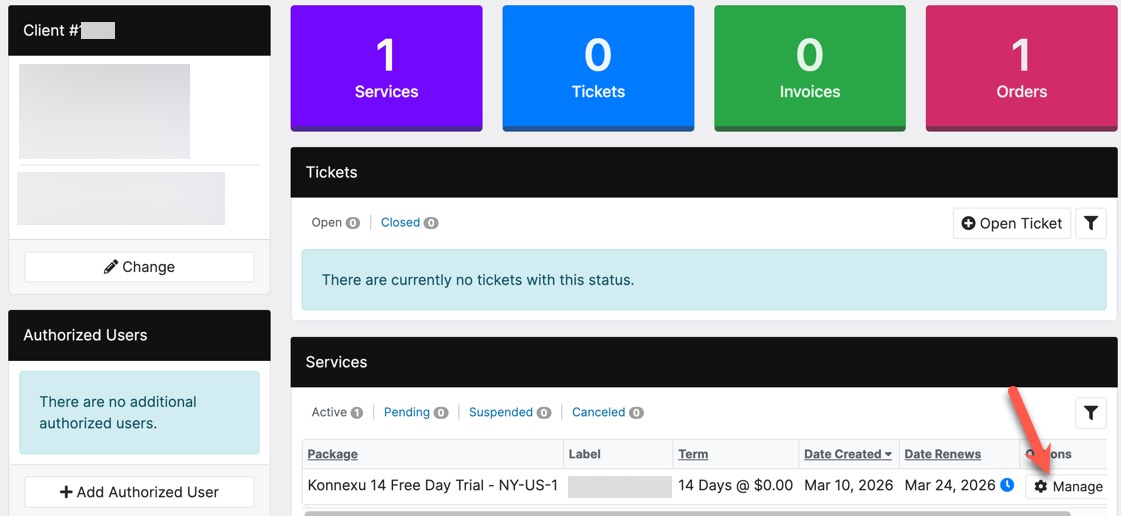
- Click the "Manage" button to the right of your domain in the main dashboard.
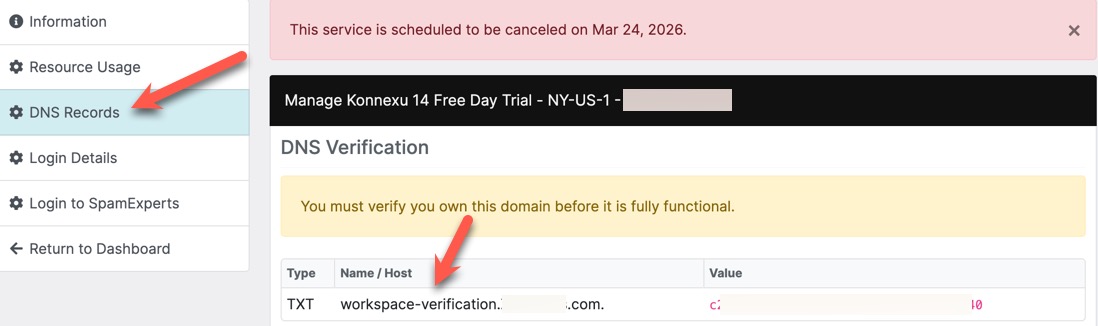
- Click the left menu "DNS Records" to show the DNS Records.
- The first record will be a TXT record you need to add to your domain DNS settings at your domain registrar. It should be something like "workspace-verification" or
similar. You'll need the Name/Host and Value to enter at your domain registrar.
- Once you add that to your domain registrar, it will propagate based on their timeline for propagation. After propagation, which sometimes only takes a few minutes, your domain will be verified and your site will be active.
- Ensure you add the rest of the MX, CNAME and TXT records in order to have your business Email work.
- The DKIM record is especially important in order for your business Emails to work properly.
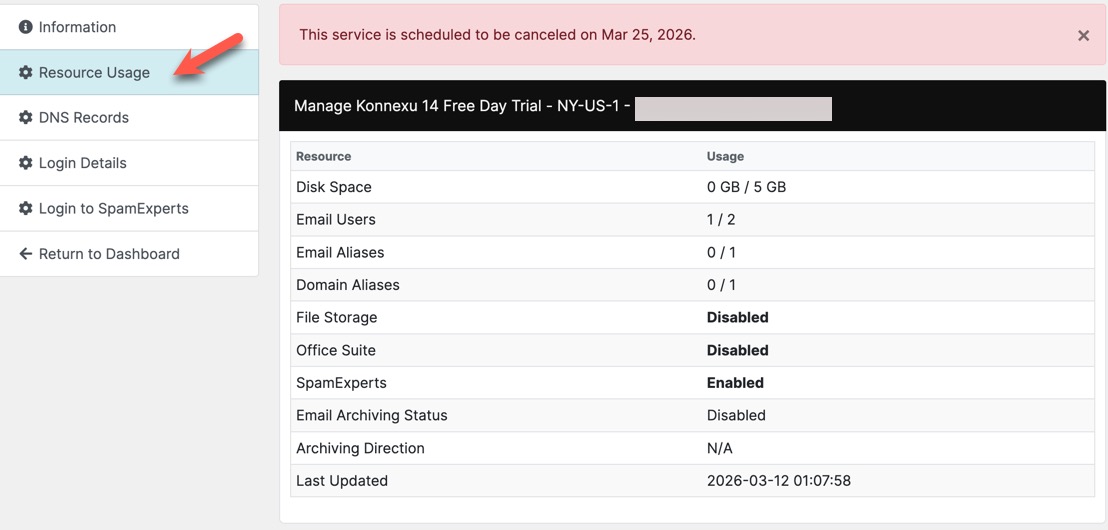
Viewing Site Resource Usage
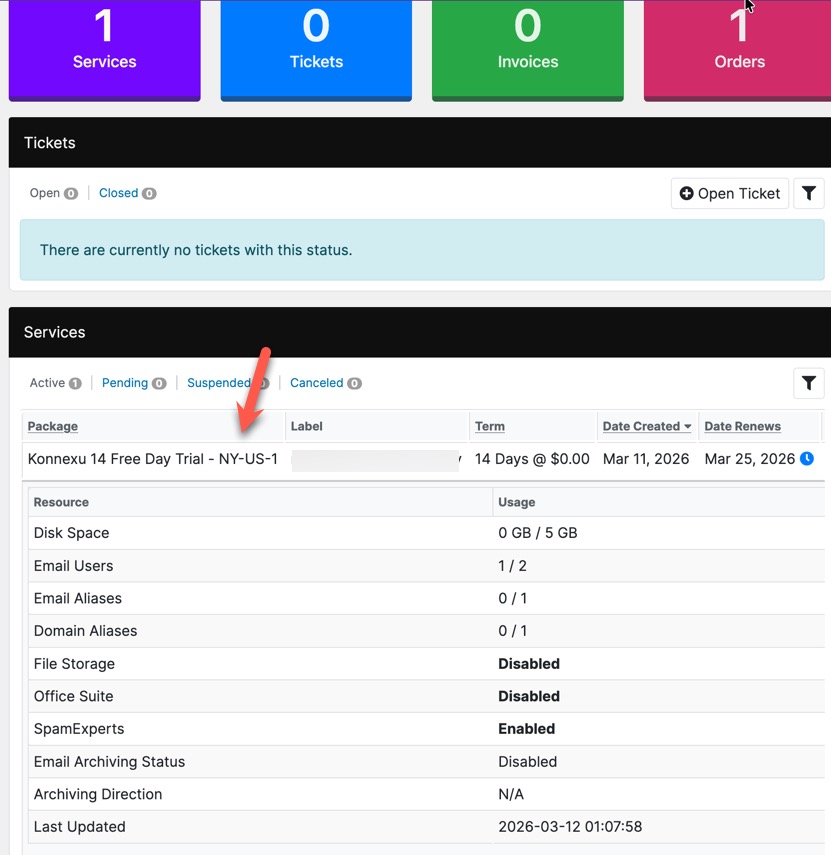
Site resource usage can be viewed in two ways. From the main client dashboard, click the site you want to view under the Services section and the resource details
will open below it.
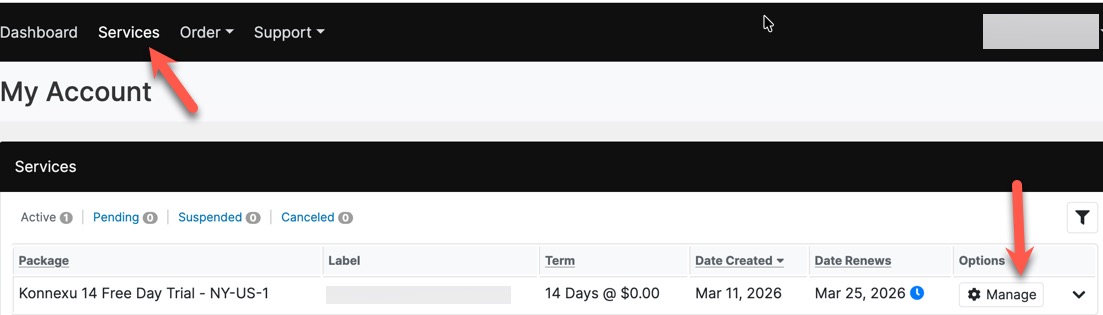
Or, you can view it from the Services page by clicking the "Services" menu and then clicking the gear to the right of the site you want to see resources for.
Once in the Services page, click the "Resource Usage" menu on the left. The resources this site is using will show to the right.
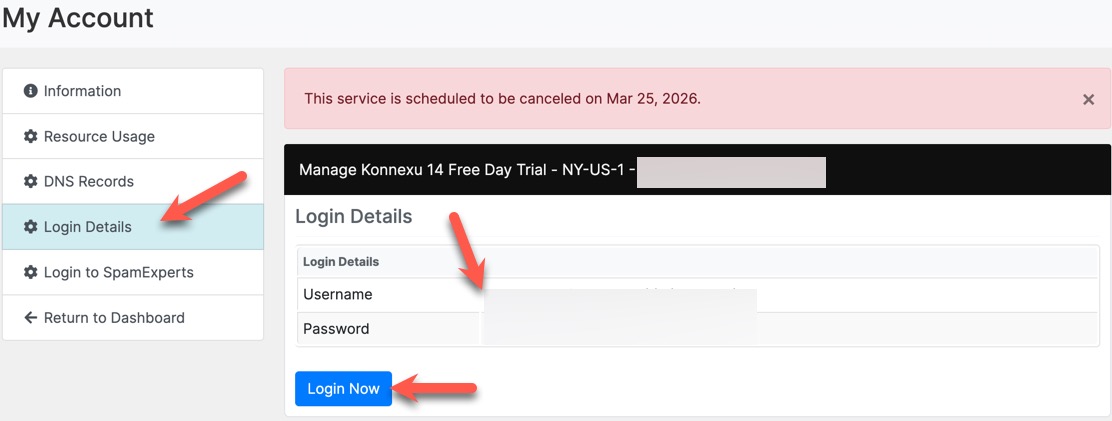
Email Webmail Log In
Info for how to log in to the workspace (webmail) admin area as the admin user in order to check Email, create additional Email addresses, and more. Details on how to use the business Email are found here.
When in the Services page (details above for how to get there), click the "Login Details" menu on the left. Your log in info will show to the right with a button to take you to the log in page.
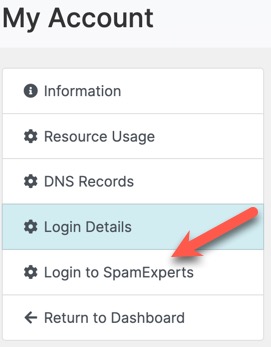
Spam Experts Log In
Spam Experts is a tool for managing spam in your Email accounts. It's important to set your whitelist of domains you do not want blocked and setting up any you know you want to block. You'll find "Login to Spam Experts" in the menu on the left (we suggest right-clicking and choosing to open in a new tab). The login button will go to the Spam Experts and auto log in. Should you bookmark the page and want to log in, details are the same as your webmail admin user above.
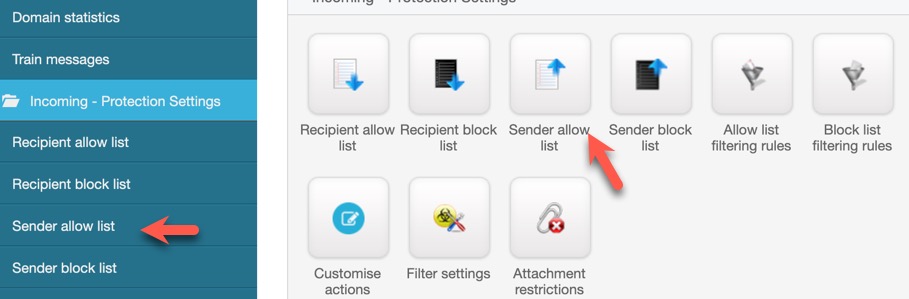
Spam Experts Tip
We recommend first setting your "sender allow list" (whitelist) which will ensure that Emails you want to get from specific domains will not be filtered out as spam.
When logged in to Spam Experts, scroll down to "Incoming - Protection Settings" which you will see in the left menus but also in the center widgets. Click either the "Sender allow list" menu on the left or the "Sender allow list" button on the right.
You can either create a CSV and import a list, or add each one manually. If using a CSV, it must contain a header row (e.g., email) and be in ASCII or UTF-8 format.
These are a some of the domains we recommend adding to your whitelist, in addition to your own domain:
- gmail.com
- konnexu.com
- bellodynamic.com
Need help?
If you need any help, drop us a line at our Konnexu Support Portal. We're always happy to assist.