Custom Fields
These are the questions that appear on registration, member profiles, or in the search, depending on settings you choose.
In order to manage the below settings, you'll need to be logged in to your ACP.
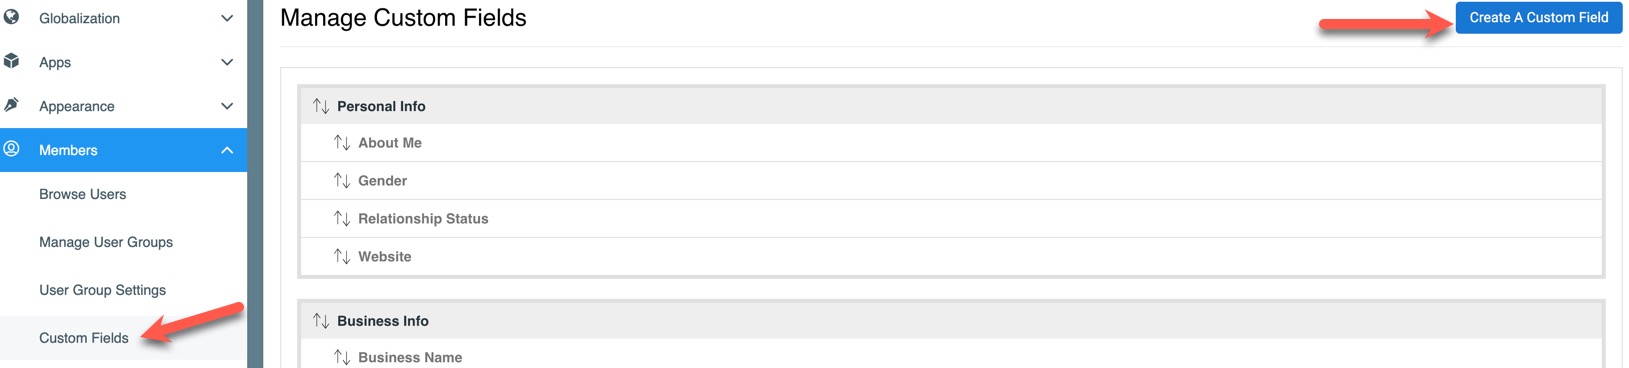
Once logged in to the ACP, navigate to Members >> Custom Fields to add, edit or remove custom fields.
Adding Custom Fields
Follow these steps to add a custom field. If you want to restrict a custom field to one or more user groups, you can do that by creating, or selecting, a custom field group that has been assigned to one or more user groups.
To create/edit/delete a custom field or custom field group, click the "Create a Custom Field" button on the top right:
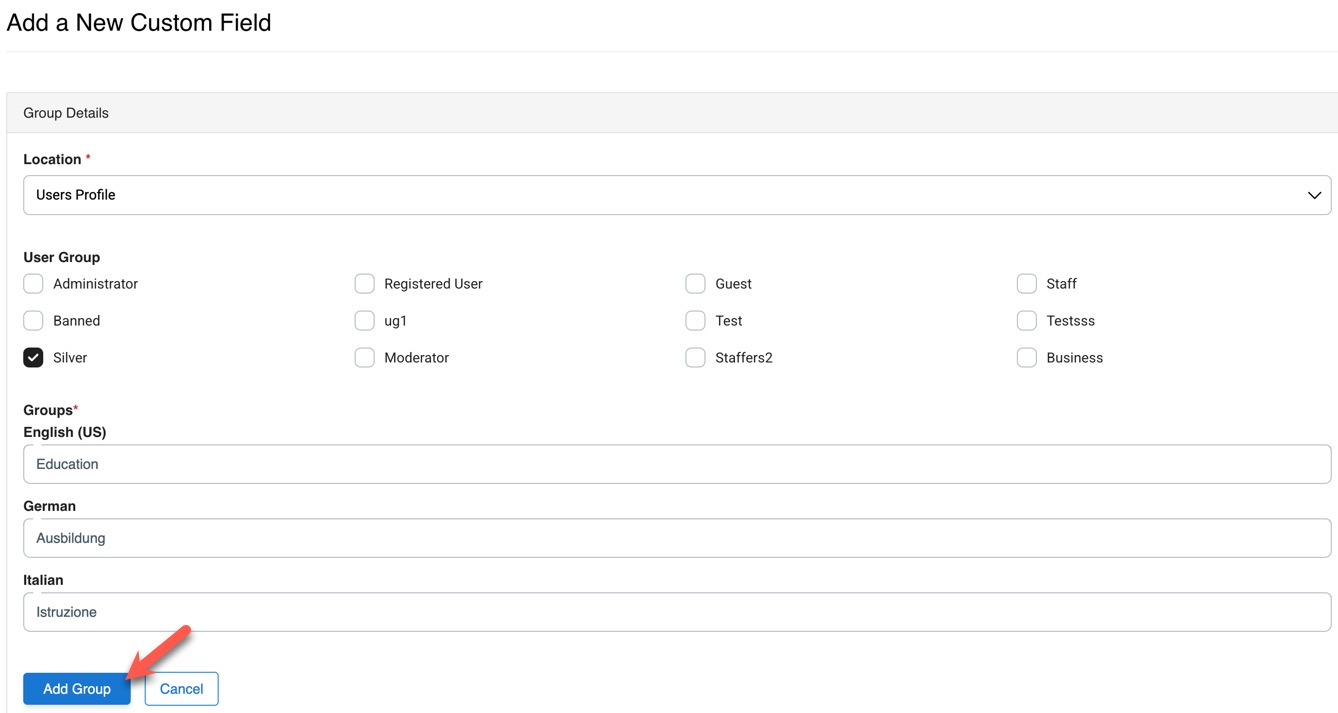
Adding a Custom Field Group
- Click "Create a New Custom Field Group"

- Choose a location. At the moment, only User Profile is available. Later on, there will be more options.
- Choose the User Group(s) that you want this custom field group available for, or leave it empty for all user groups. Any custom fields you make and assign to this custom field group will then be available to be filled in by the assigned user groups, or by all user groups if you didn't assign any. They will show to everyone able to see that member's profile, once filled in, regardless of user groups assigned to the custom field group .
- Enter a name for this group. This name will show in the location you choose for the custom field. If you have other language packs, you can also add your translations.
- Click "Add Group" and your new custom field group will be added, leaving you on the page to make a custom field.
Adding a Custom Field
After clicking the Create New Custom Field, or after creating a custom field group above, you'll be on the page to create a custom field. Follow these steps:
- Choose the custom field group. Working from our tutorial above, we'll assign this to the Education custom field group.
- Required - if you want users to be required to fill in this field, select Yes. Select No if this is not a required field.
- Include on Registration - select Yes to show this on the registration when users sign up, or select No if you don't want it on the registration page.
- Include on Search User - select Yes to show this in the search filter on the member browse page. If you select No, it will not show in the search filter.
- Location - this sets where the custom field data shows, based on the location chosen when creating a custom field group. At this time,
the user profile is the only option, so we'll show those details.
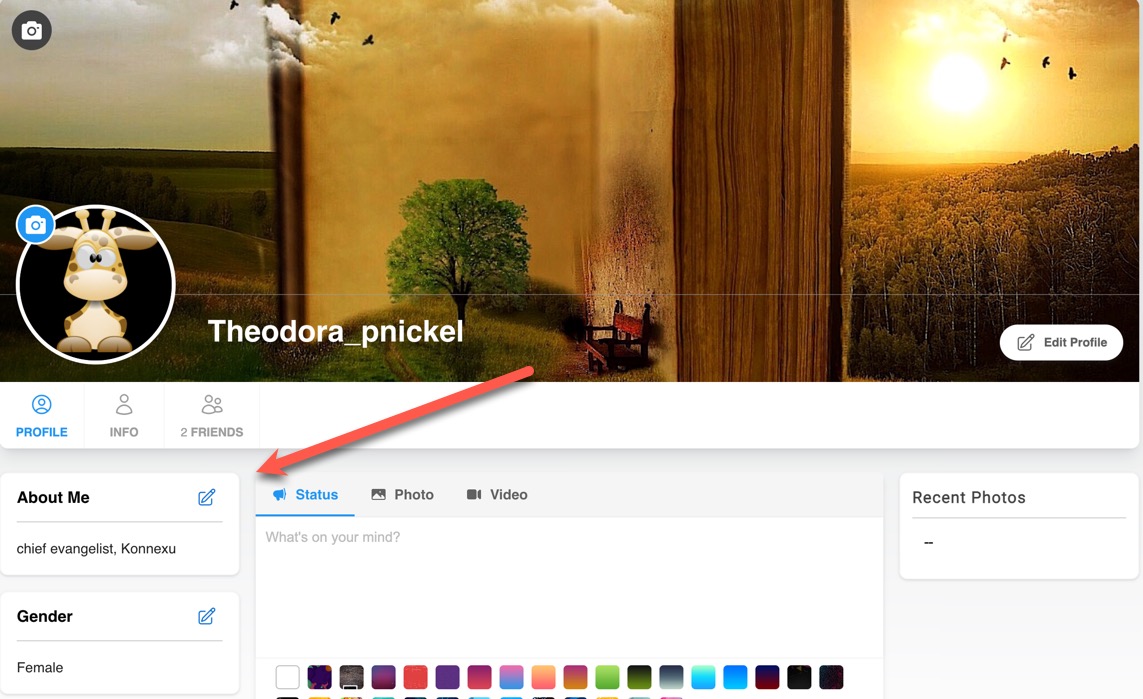
- User Profile - Main Section - this shows on the user's profile main page.
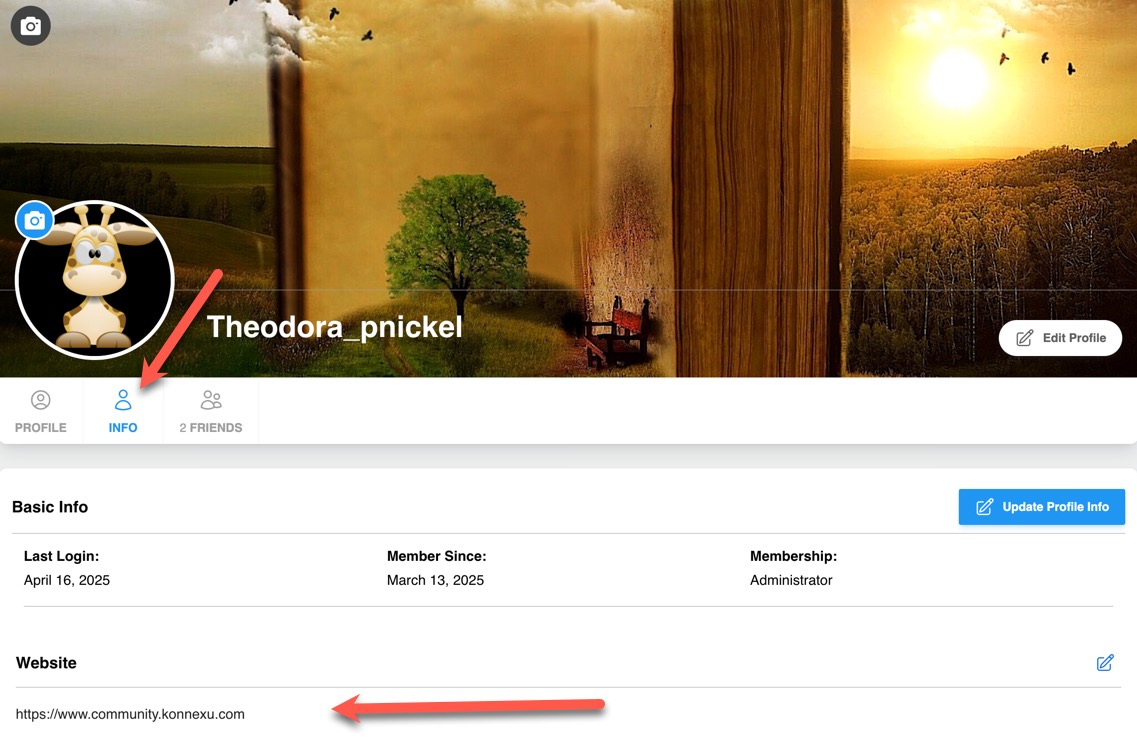
- User Profile - Basic Information - this shows on the Info tab of the user's profile page.
- User Profile - Main Section - this shows on the user's profile main page.
- Type - the type of custom field you want. There are several selections.
- Text Area - this is for a large input box. For example, an About Me box.
- Text Input (60 Characters Max) - this is a small input box. For example, a Website field.
- Select - a drop-down selection field, allows the user to select one from the list.
- Enter a Name
- Add the options for the user to choose from. To add more than one option, click the "Add New Option" button.
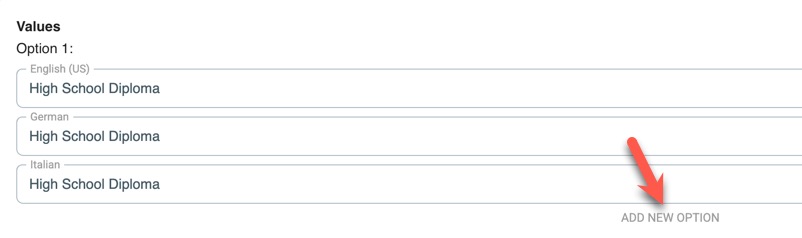
- When done, click the "Add" button.
- Here's how it looks when the user is on their edit profile page:

- Multiple Selection - a selection drop-down that allows for multiple items to be selected.
- Enter a Name
- Add the options for the user to choose from. To add more than one option, click the "Add New Option" button. See the screenshot above, in the steps for the "Select" type.
- When done, click the "Add" button.
- Here's how it looks when the user is on their edit profile page:

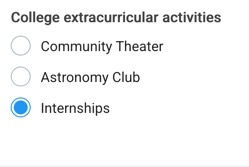
- Radio - a radio selection that allows one choice.
- Enter a Name
- Add the options for the user to choose from. To add more than one option, click the "Add New Option" button. See the screenshot above, in the steps for the "Select" type.
- When done, click the "Add" button.
- Here's how it looks when the user is on their edit profile page:
- Checkbox - a checkbox list that allows more than one selection.
- Enter a Name
- Add the options for the user to choose from. To add more than one option, click the "Add New Option" button. See the screenshot above, in the steps for the "Select" type.
- When done, click the "Add" button.
- Here's how it looks when the user is on their edit profile page:

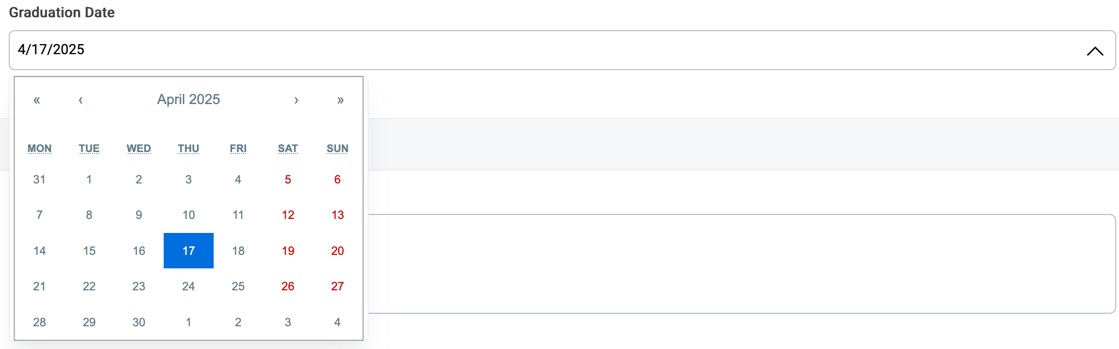
- Date - a date picker field.
- Enter a Name
- Click the "Add" button.
- Here's how it looks when the user is on their edit profile page:
Editing a Custom Field or Custom Field Group
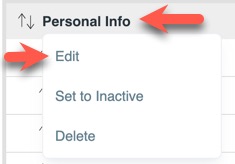
To edit a custom field or custom field group, click the name of the one you want to edit and select "Edit" in the drop-down list.
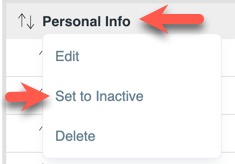
Activate or De-activate a Custom Field or Custom Field Group
To activate or de-activate a custom field or custom field group, click the name of the one you want to activate/de-activate and select "Set to Inactive/Set to Active" in the drop-down list.
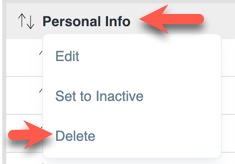
Delete a Custom Field or Custom Field Group
To delete a custom field or custom field group, click the name of the one you want to delete and select "Delete" in the drop-down list. Please note that this is irreversible. Once deleted, the field is gone. If deleting a custom field group, all fields within that group will also be deleted.
Need help?
If you need any help, drop us a line at our Konnexu Support Portal or ask a question at the Konnexu Community. We're always happy to assist.